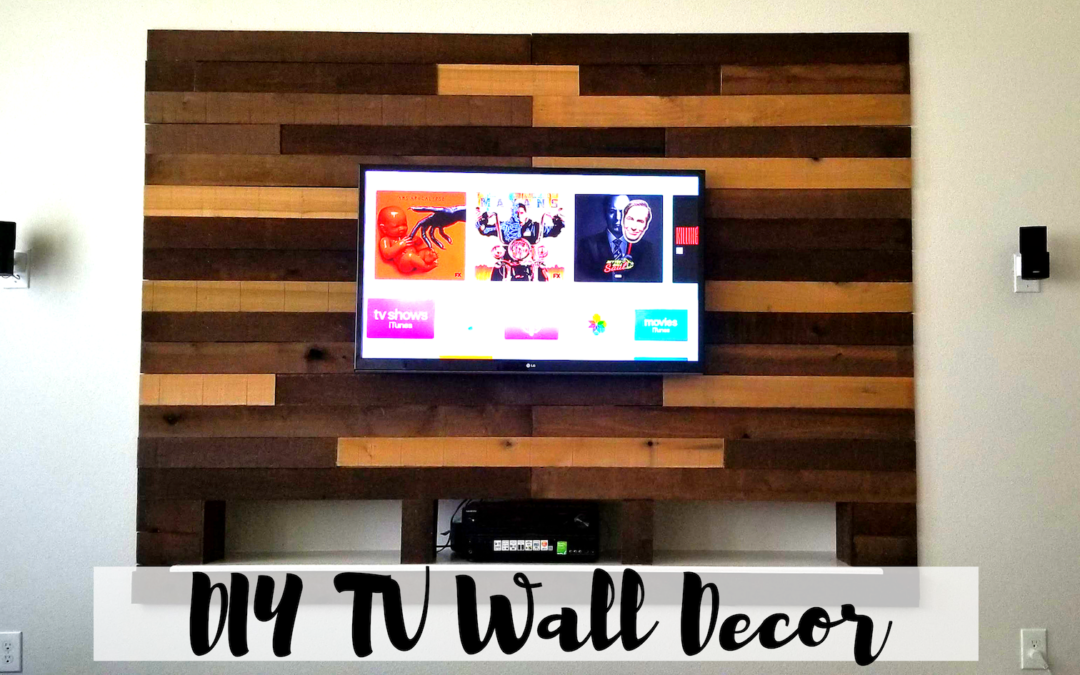
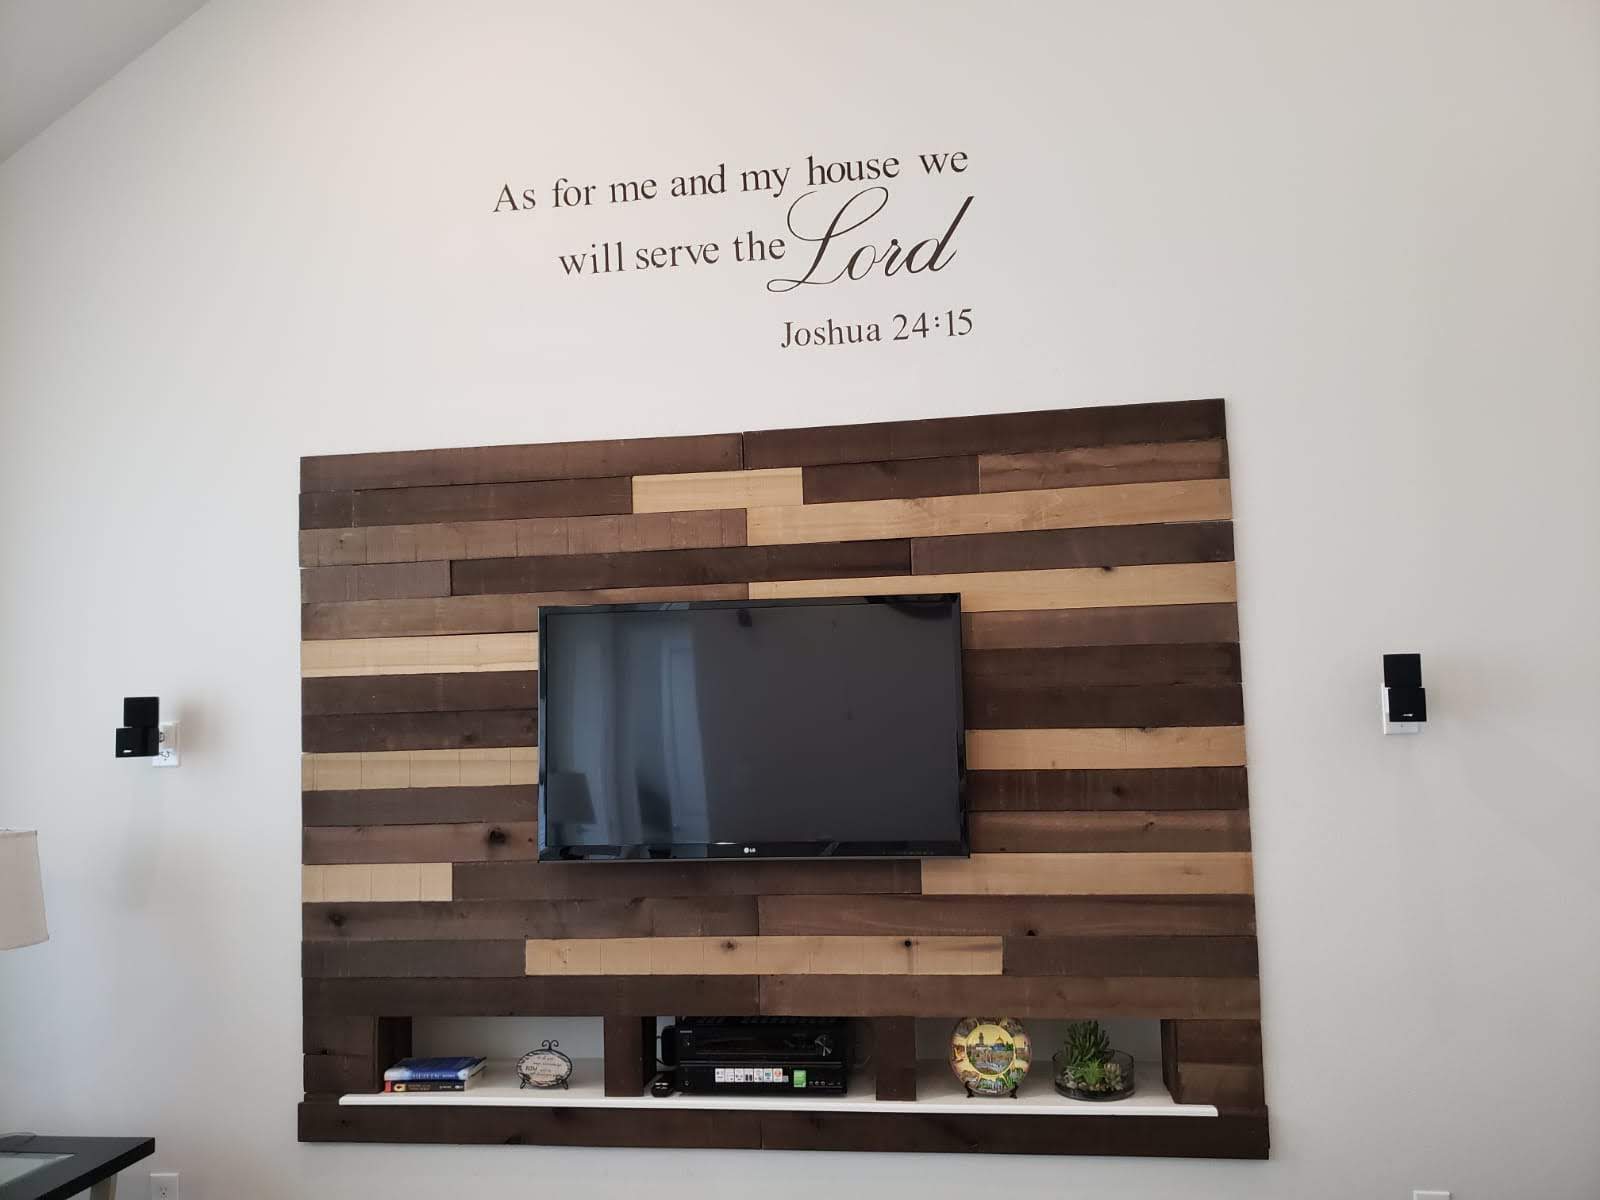
DIY – Weathered Wood TV Wall Project
Below is how we solved the Problem. And the best part is that this project took us less than 4 hours!!!
DIY Skill Level Needed:

Materials
- 8 – Whitewood Framing Studs (Size: 2 in. x 4 in. x 96 in.)
- 6 – Boxes of Weathered Hardwood Board (8-Piece per Box / Each plank size: 1/2 in. x 4 in. x 4 ft.)
- 2 – Whitewood Common Board (Size: 1 in. x 8 in. x 8 ft.)
- 1 – Box of 3-1/2 in. Construction Screw (1 lb.-Box)
- 1 – Box of 2-1/2 in. Construction Screw (1 lb.-Box)
Before Picture

Observe the media and all the wires

Notice the weird location of Smurfs tube?
Project Day
Step 1: Building Shelve for Media System
The shelves are not touching the back wall so that we have easy access to all cables and to hide unwanted media system stuff above the shelf (will be hidden behind the weathered wood wall)

Built this simple shelf. Used my Ryobi power hand saw for making cuts in the 8 inch Common Boards.
Step 2: Assemble Wall Support. Used my Ryobi small miter for all cuts on the 2 x 4 studs.

Step 3: Install TV Mount on the new Wall Support

Step 4: Install Weathered Boards

Vola!!! Weathered Wall Reveal!!!
Tools
Here are links to some more Weathered Boards for DIY similar projects:
- 1/4 in. x 3 in. x 2 ft. Brown Reclaimed Smart Paneling 3D Barn Wood Wall Plank (Design 1) (20-Case)
- 1/4 in. x 5 in. x 2 ft. Brown Reclaimed Smart Paneling 3D Barn Wood Wall Plank (Design 1) (12-Case)
- 1/4 in. x 5 in. x 2 ft. Mixed Color Reclaimed Smart Paneling 3D Barn Wood Wall Plank (Design 5) (12 – Case)
- 3/8 in. x 4 ft. Multi-Width Multi-Color Kiln Dried Barnwood Kit (10.2 sq. ft.)